
[ad_1]
 Source: Christine Romero-Chan / iMore
It doesn’t matter if you need to switch your account type or cancel your subscription altogether — you need to be able to manage your Apple Music account on all of your devices, including your iPhone, iPad, and Mac. Thankfully, Apple makes it very easy to do just that, no matter your device.
Whether on your iPhone, iPad, or Mac, here’s how you manage your Apple Music account no matter where you are.
Sweet Music
![]()
Apple Music
Millions of songs in your pocket.
Apple’s music streaming service boasts over 70 million songs, live radio stations anchored by renowned personalities, and thousands of curated playlists spanning every genre you can imagine.
How to move from an individual Apple Music plan to a Family plan on your iPhone or iPad
If you want to create your family plan in Apple Music on our best iPhones or iPad, keep in mind that you’ll first need to be the Family Organizer for your Family Sharing group. If you haven’t already, go to Settings > iCloud > Set Up Family Sharing to start that process.
Once you’ve set up your Family Sharing group, here’s how to switch your account.
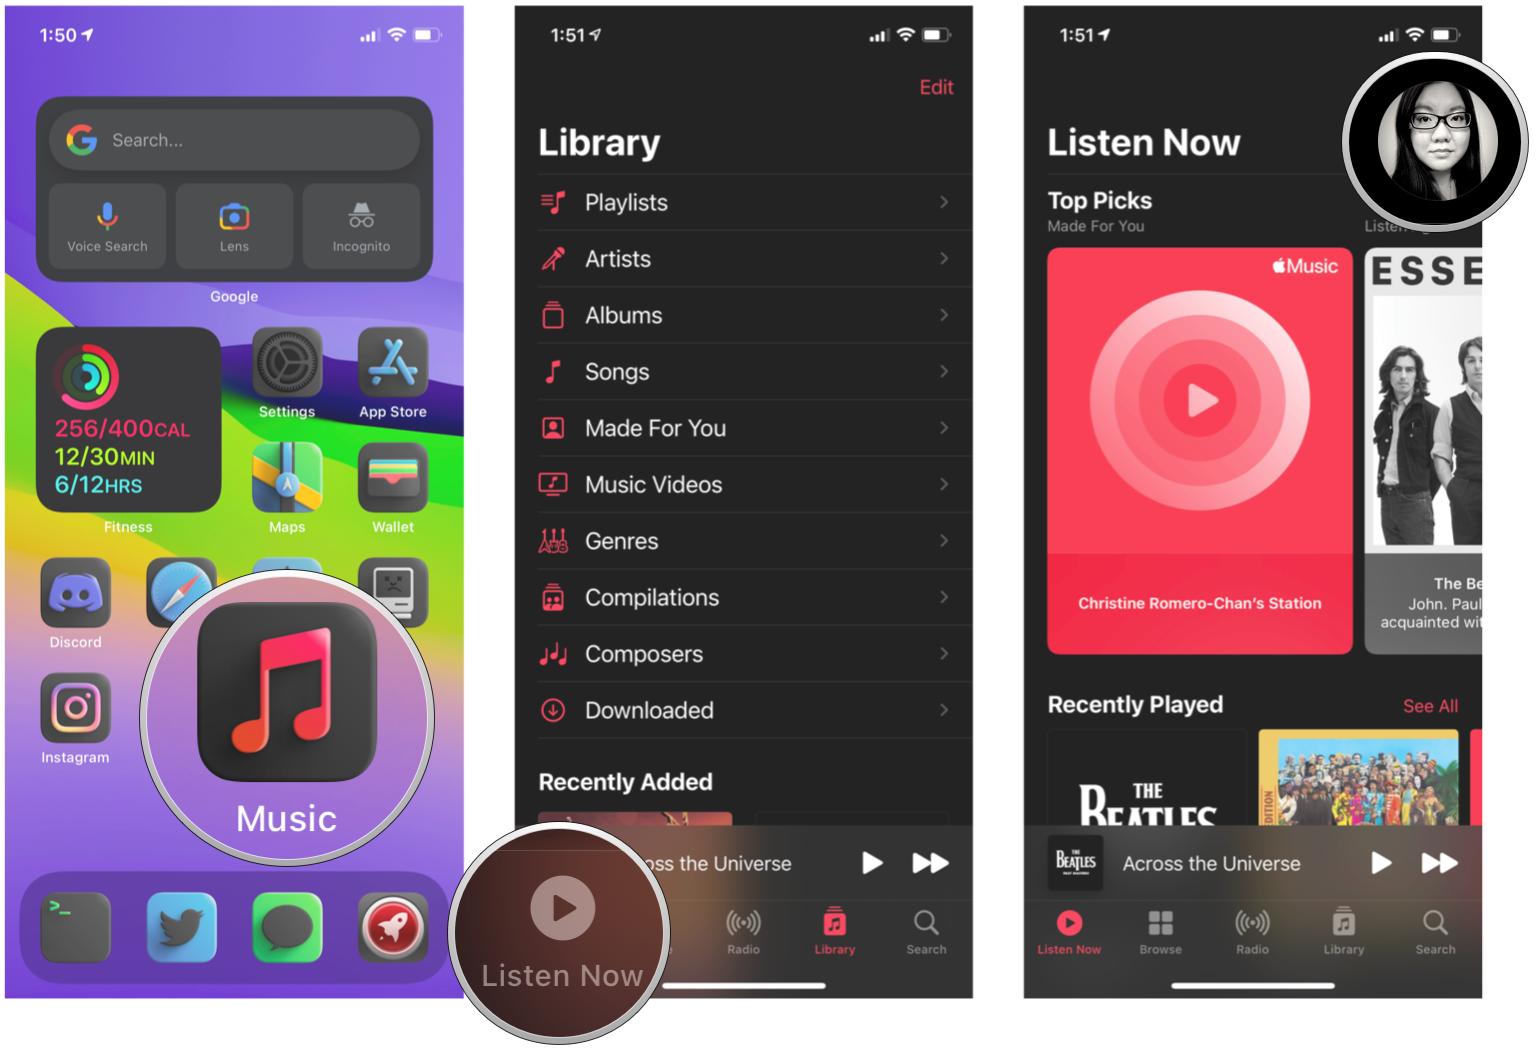
- Open the Music app on your iPhone or iPad.
- Tap Listen Now.
-
Tap the Account icon in the upper right corner.
 Source: iMore
 -
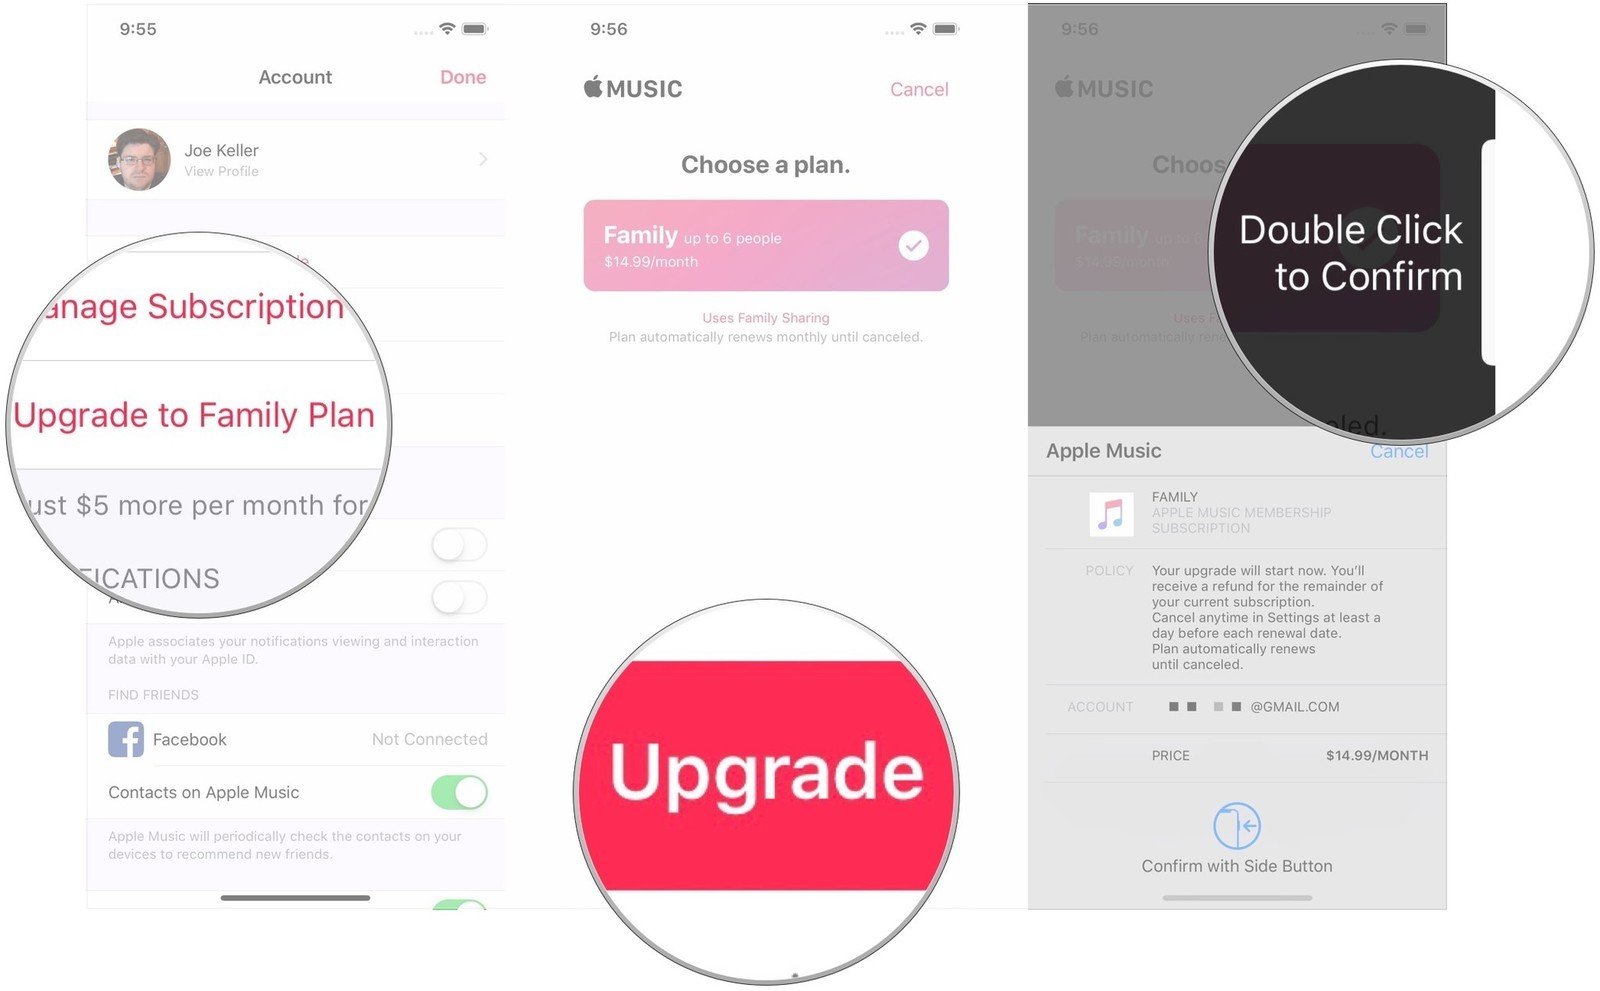
Tap Upgrade to Family Plan.
- Tap Upgrade.
-
Confirm your purchase of a Family Plan upgrade.
 Source: iMore
How to move from the head of a Family plan to an Individual plan on your iPhone or iPad
- Open the Music app on your iPhone or iPad.
- Tap Listen Now.
-
Tap the Account icon in the upper right corner.
Source: iMore -
Tap Manage Subscription.
- Tap Individual (1 Month) or Individual (1 Year) to switch from a Family plan to an individual plan.
-
Confirm the purchase of your plan.
 Source: iMore
How to cancel your Apple Music subscription on your iPhone or iPad
- Open Music.
- Tap Listen Now.
-
Tap the Account icon in the upper-right corner.
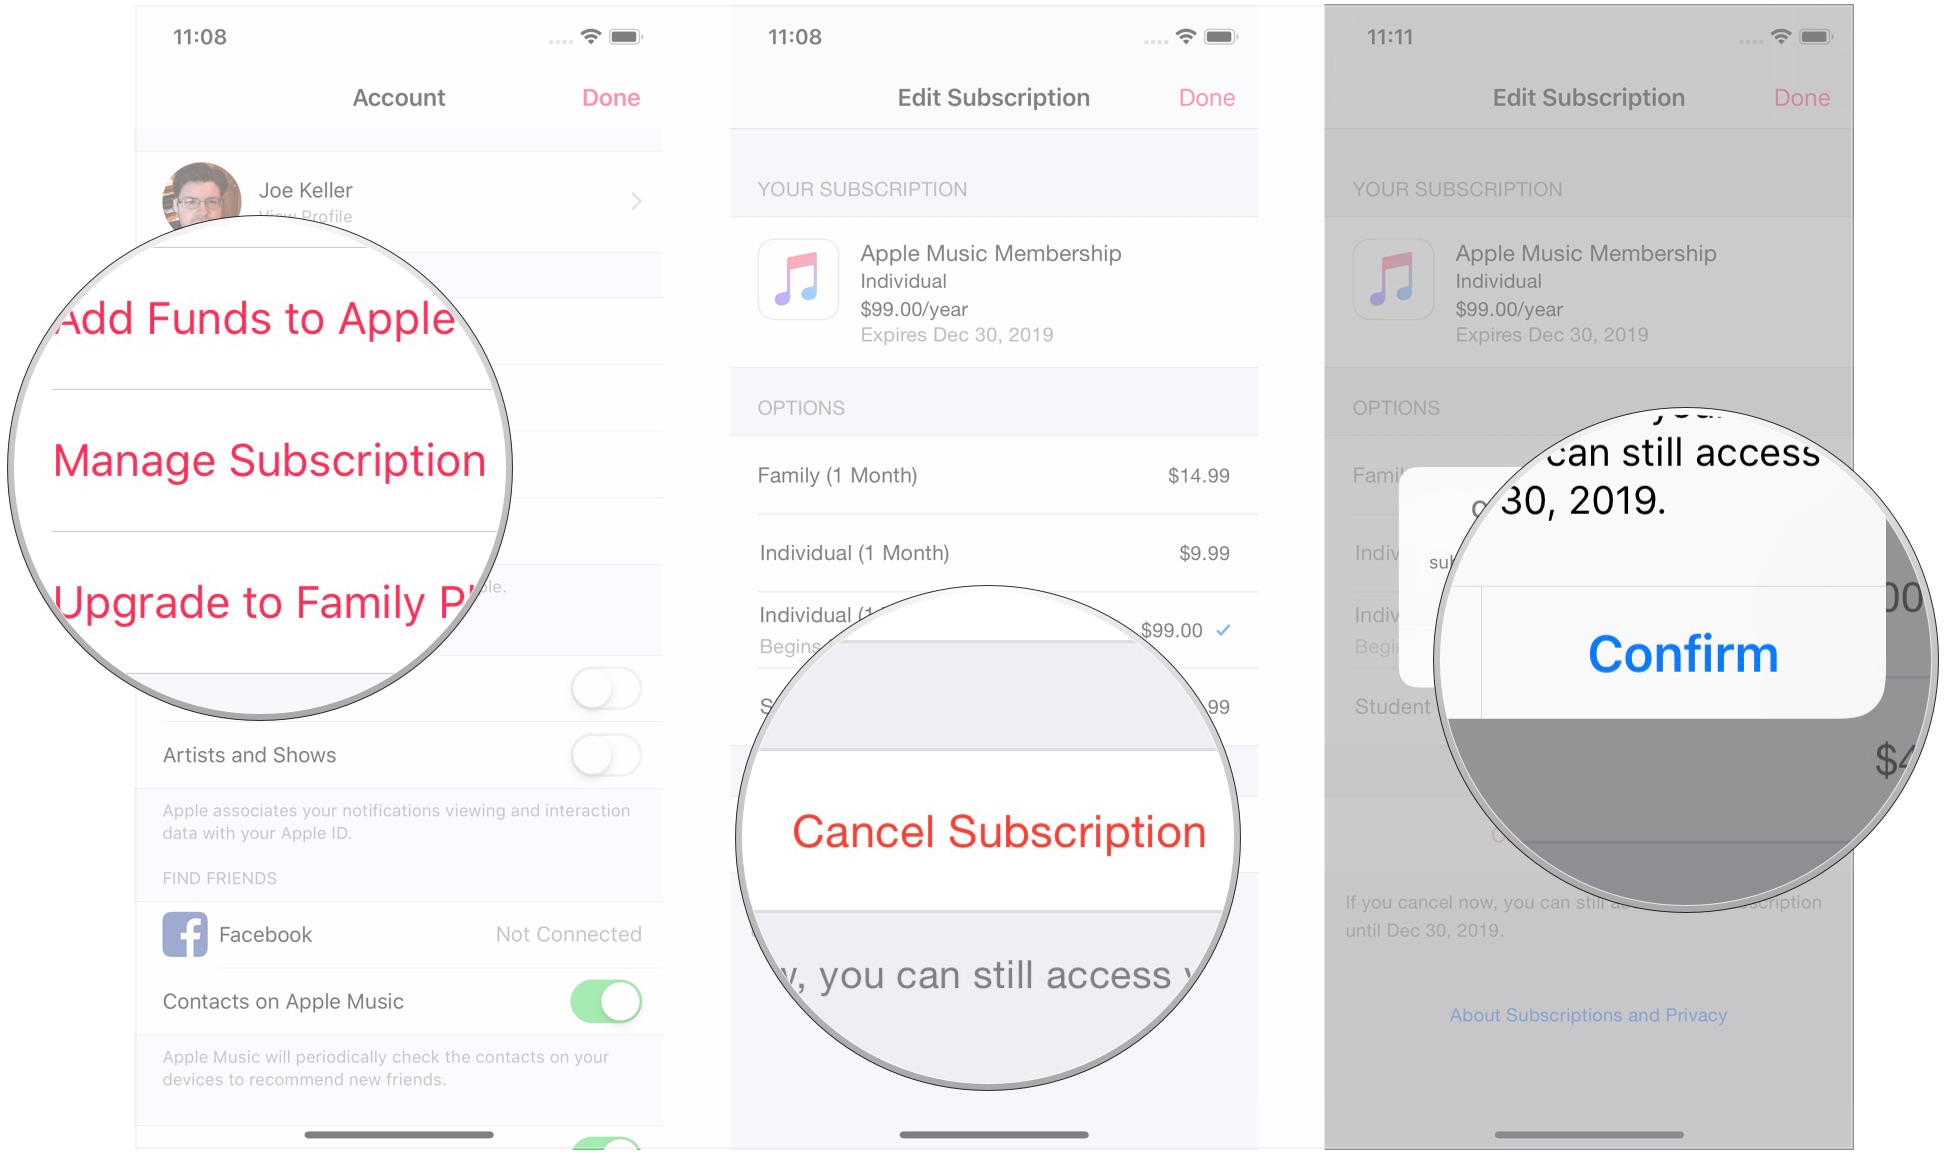
Source: iMore - Tap Manage Subscription.
- Tap Cancel Subscription.
-
Tap Confirm.
 Source: iMore
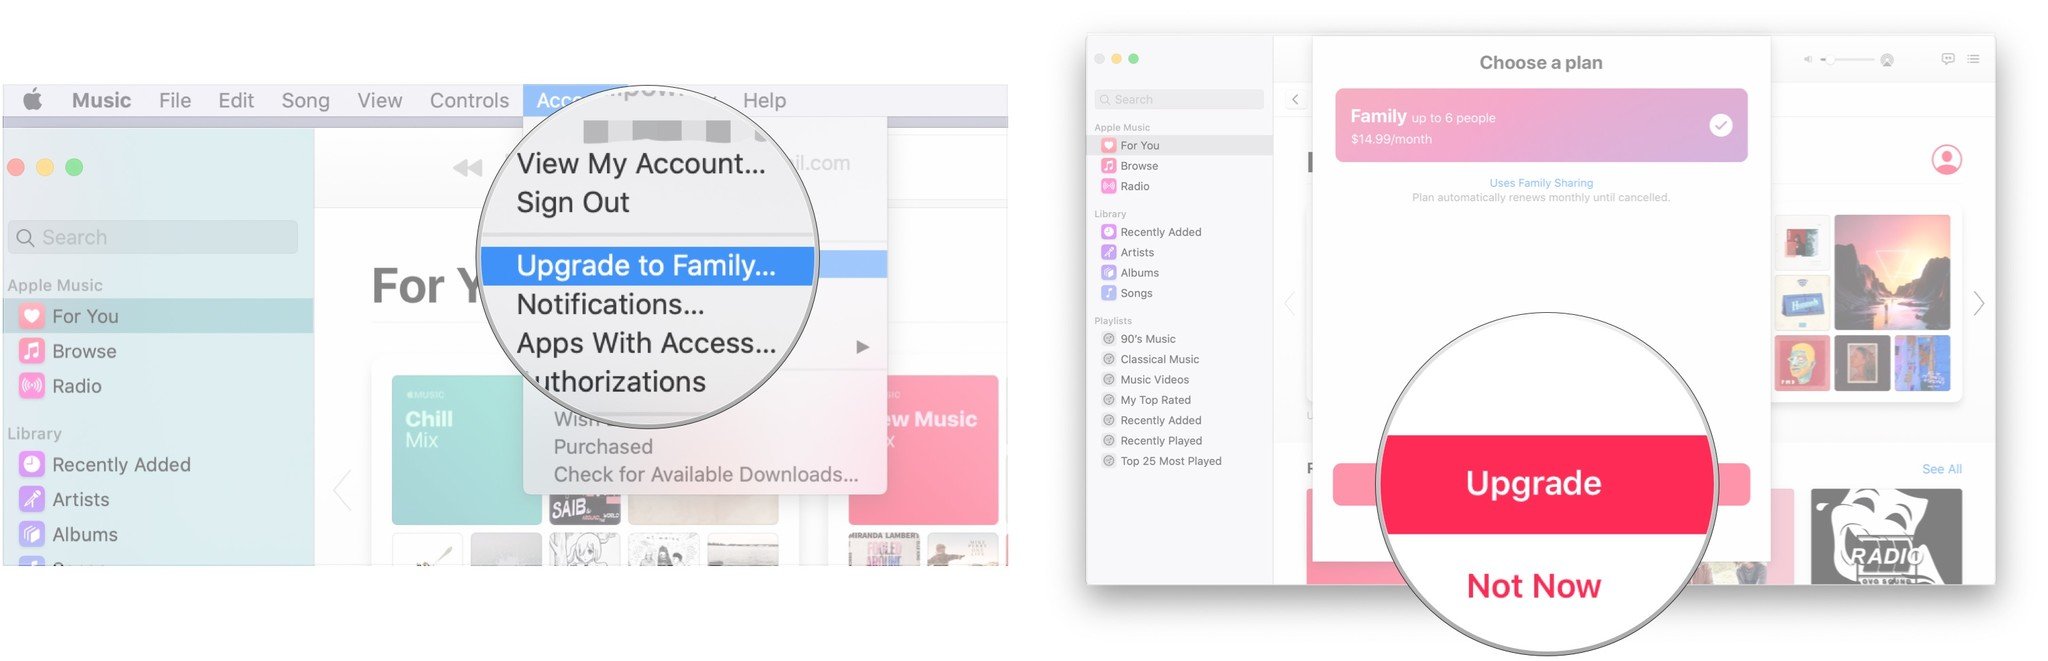
How to switch to a Family Plan for Apple Music on your Mac
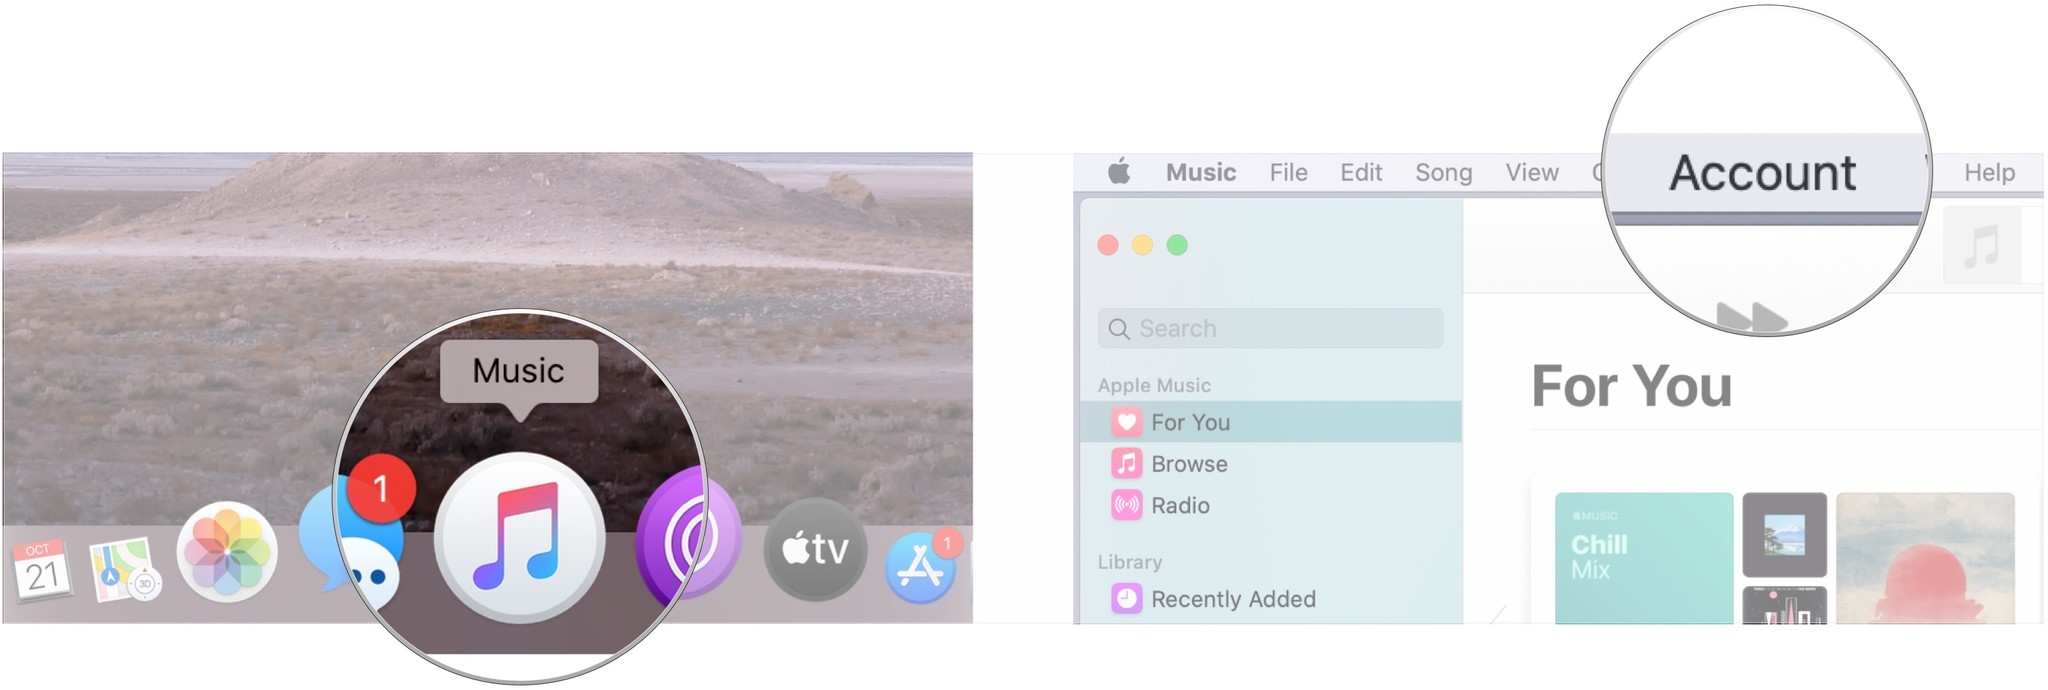
- Open Music on your Mac or iTunes if you’re running macOS Mojave and earlier.
-
Click Account in the Menu bar.
 Source: iMore
 - Click Upgrade to Family…
-
Click Upgrade.
 Source: iMore
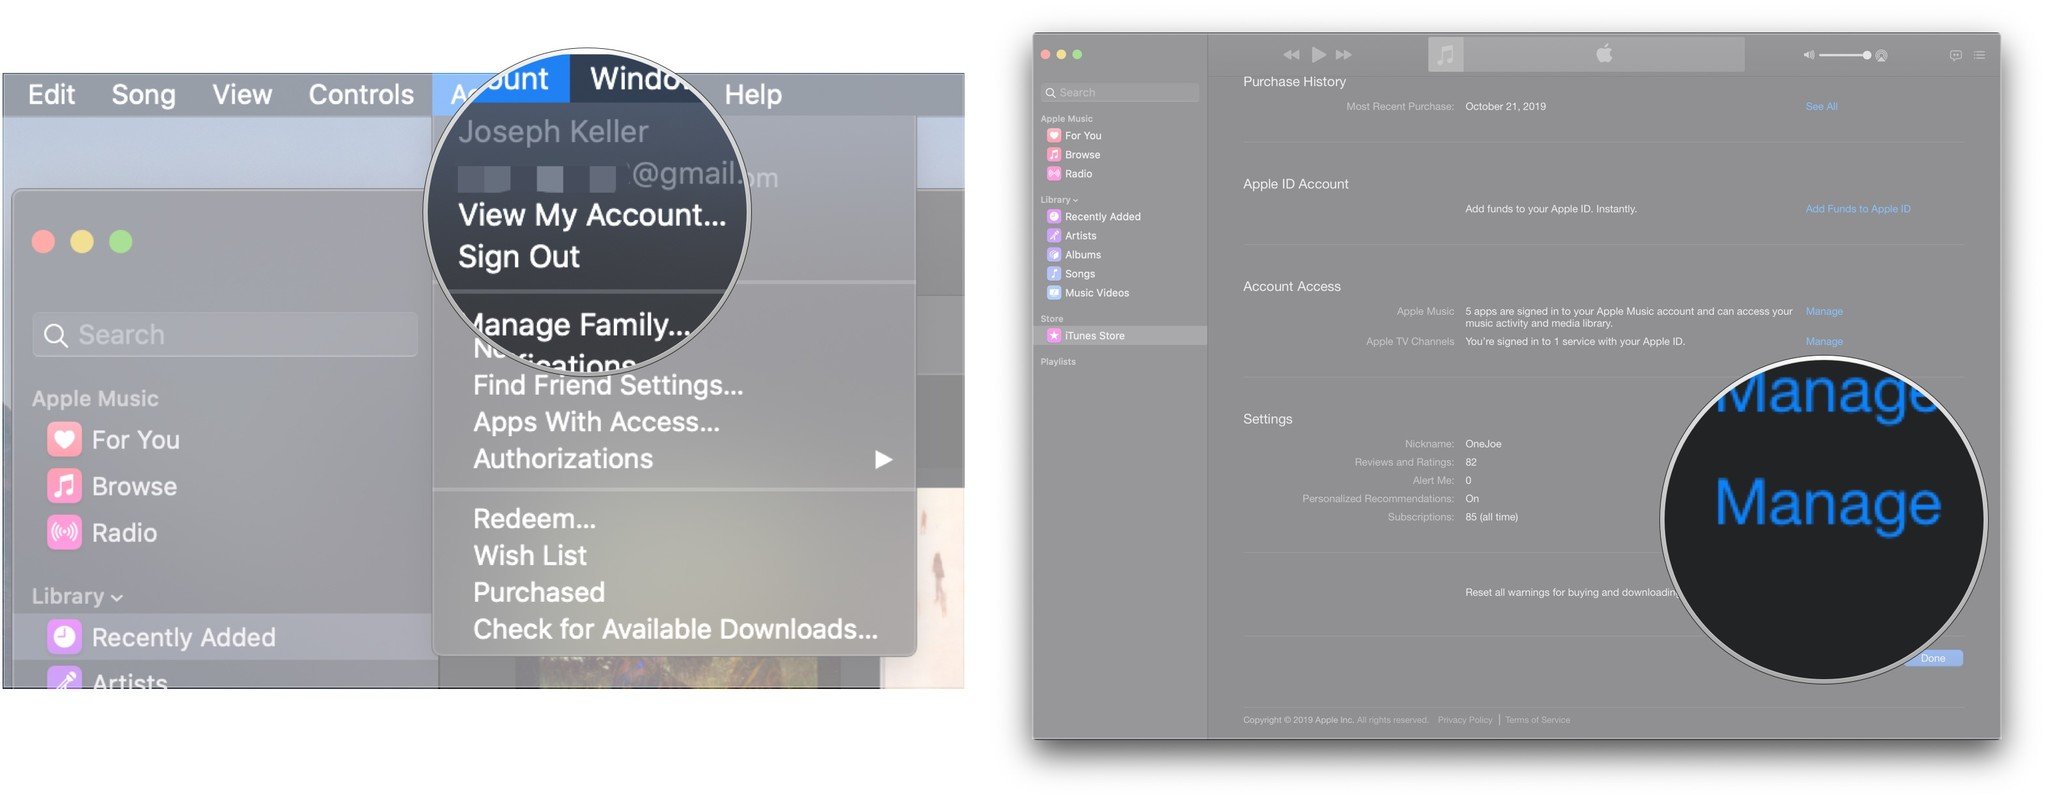
How to switch to an individual plan for Apple Music on your Mac
- Open Music on your Mac or iTunes if you’re running macOS Mojave and earlier.
-
Click Account in the Menu bar.
 Source: iMore
 - Click View My Account… You may be asked to sign into your account.
-
Click Manage next to Subscriptions.
 Source: iMore
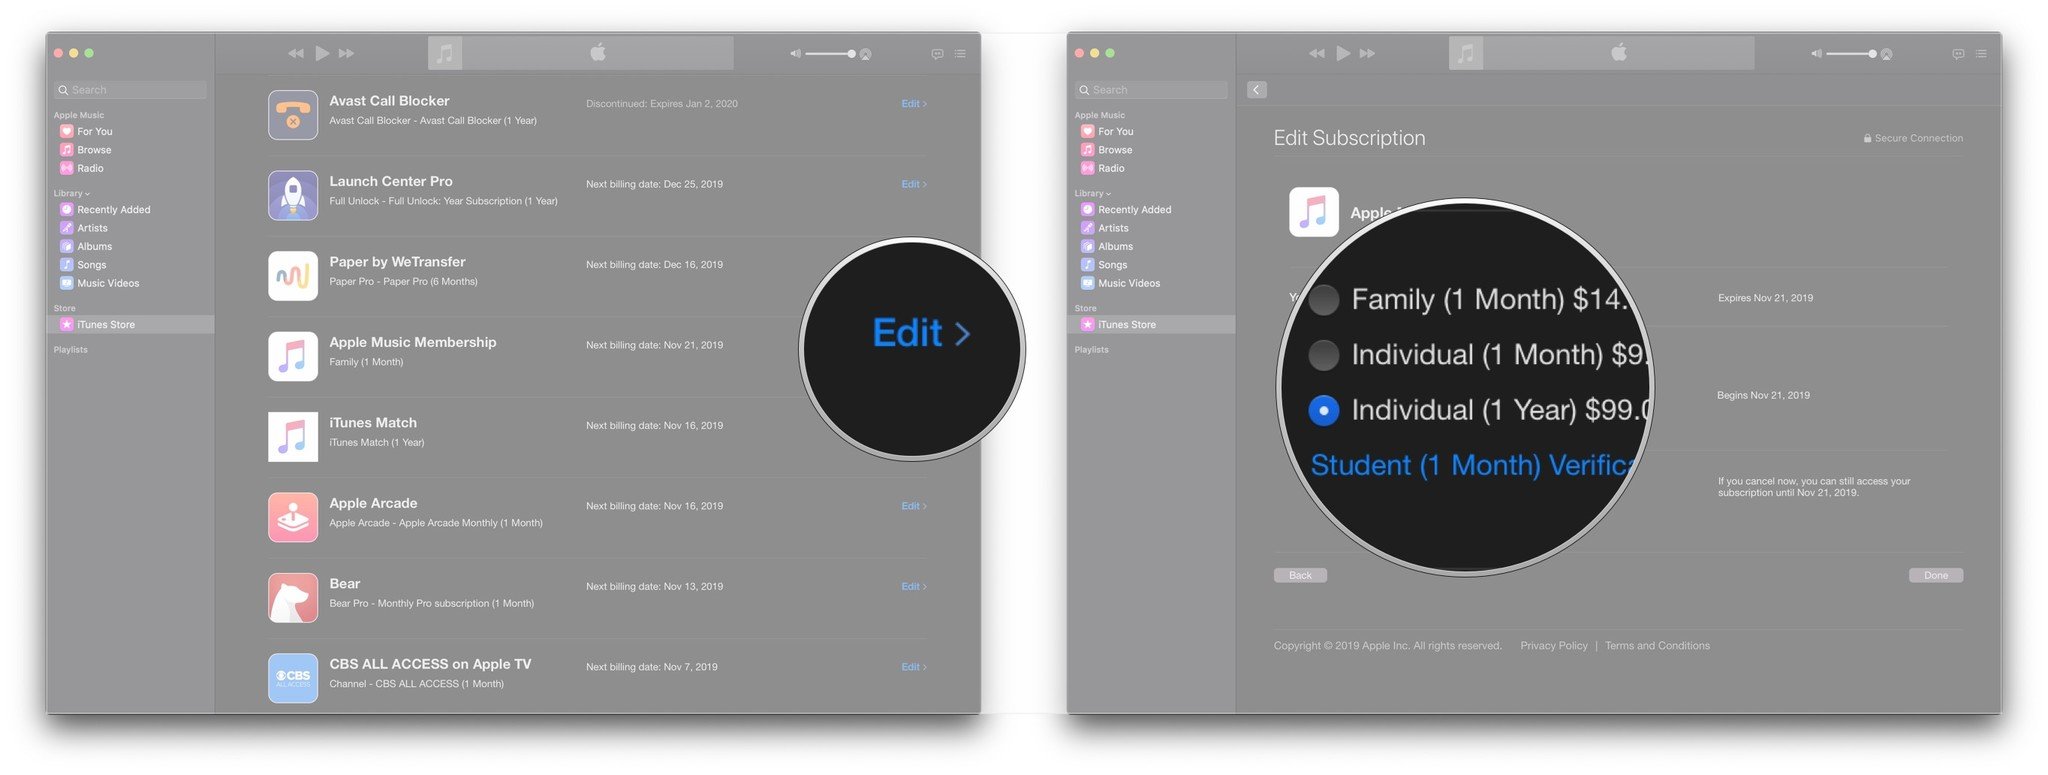
 - Click Edit next to your Apple Music subscription.
-
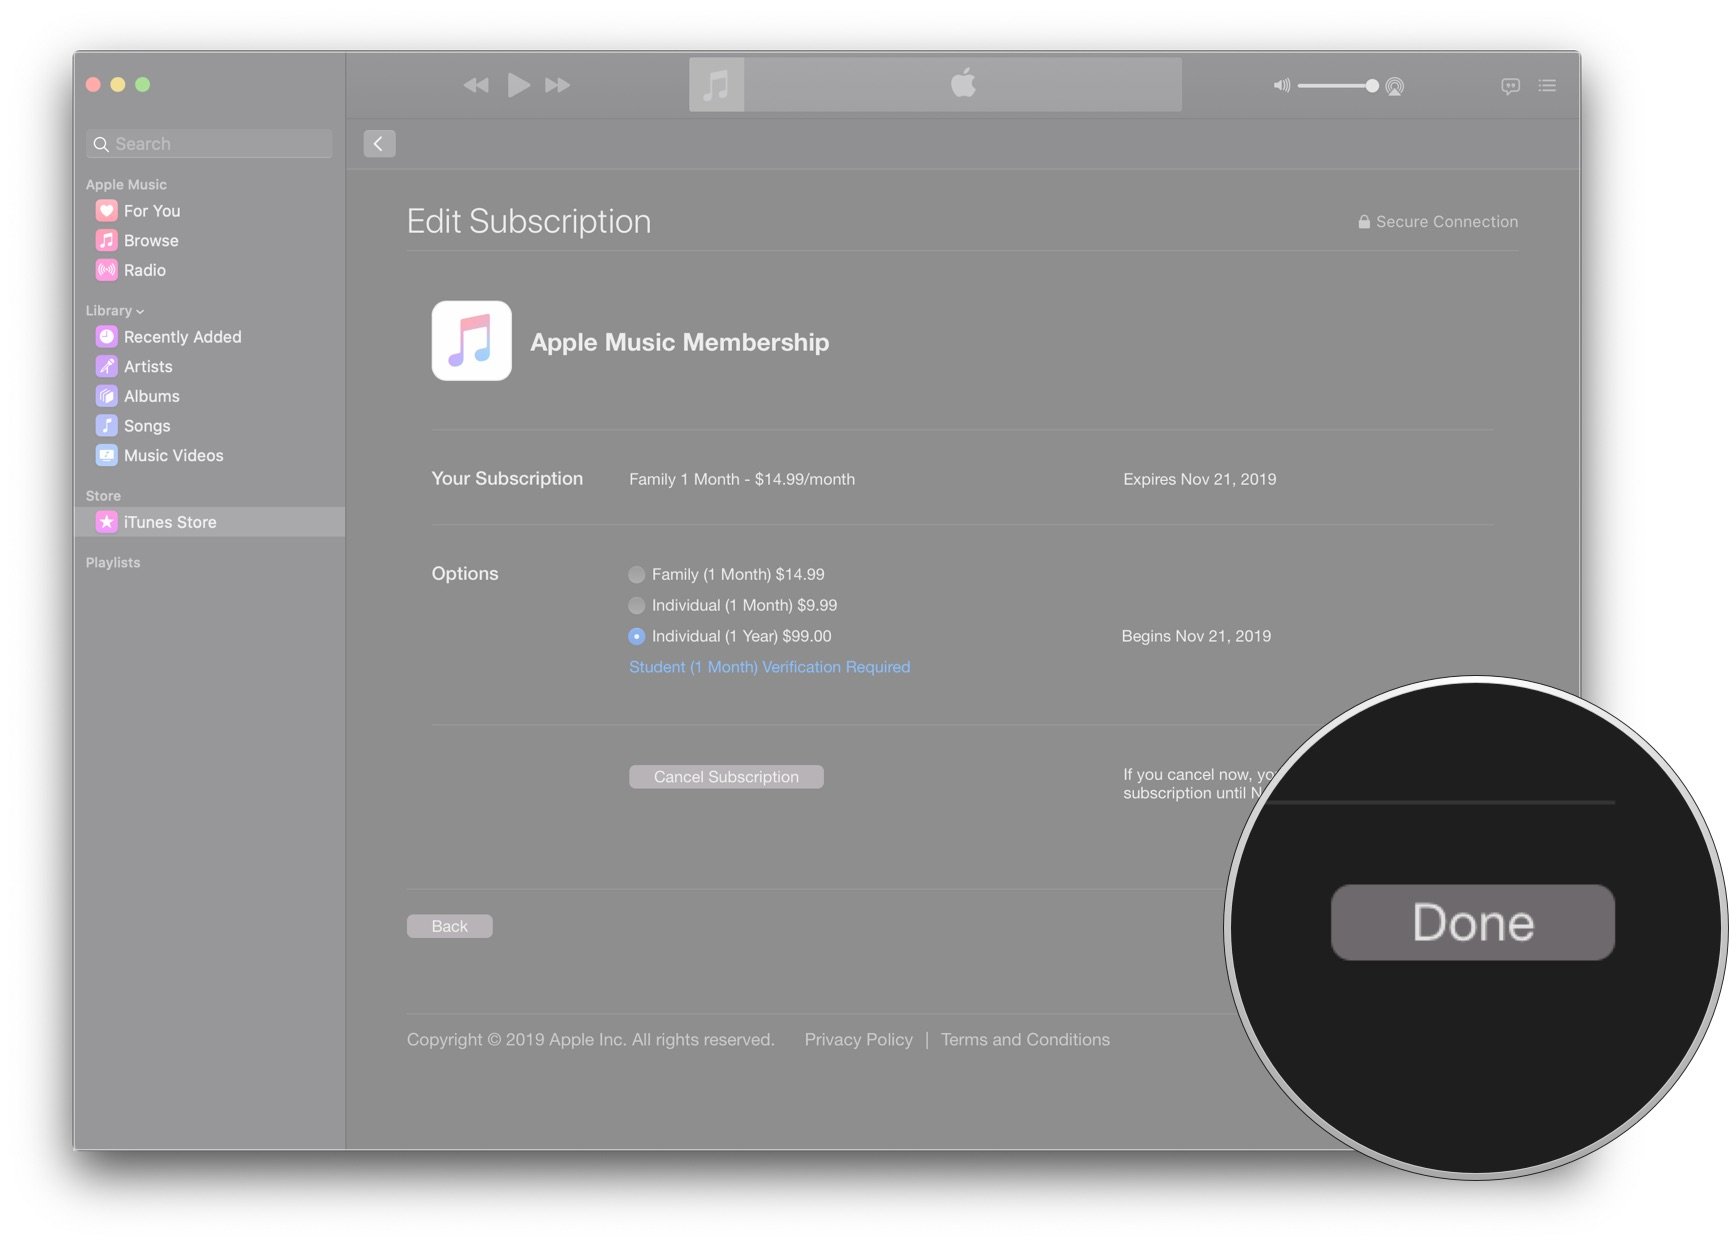
Click on the button next to either Individual (1 Month) or Individual (1 Year).
 Source: iMore
 -
Click Done.
 Source: iMore
How to cancel your Apple Music subscription on your Mac
- Open Music on your Mac or iTunes if you’re running macOS Mojave and earlier.
-
Click Account in the Menu bar.
 Source: iMore
 - Click View My Account… You may be asked to sign into your account.
-
Click Manage next to Subscriptions.
 Source: iMore
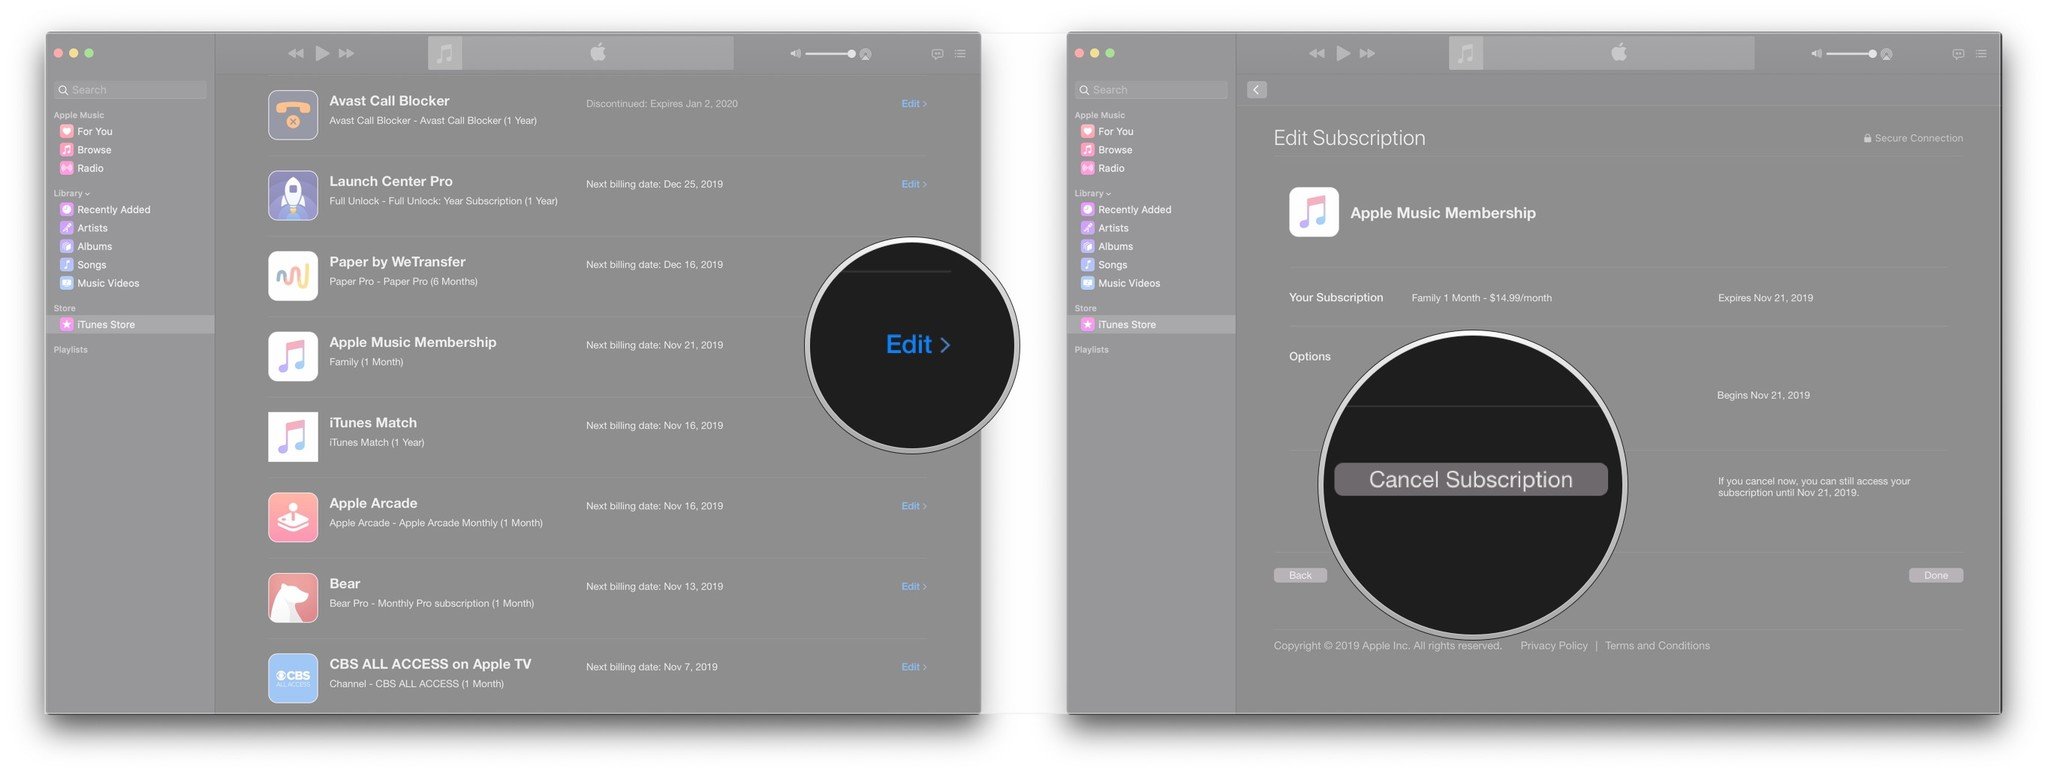
 - Click Edit next to your Apple Music subscription.
-
Click Cancel Subscription.
 Source: iMore
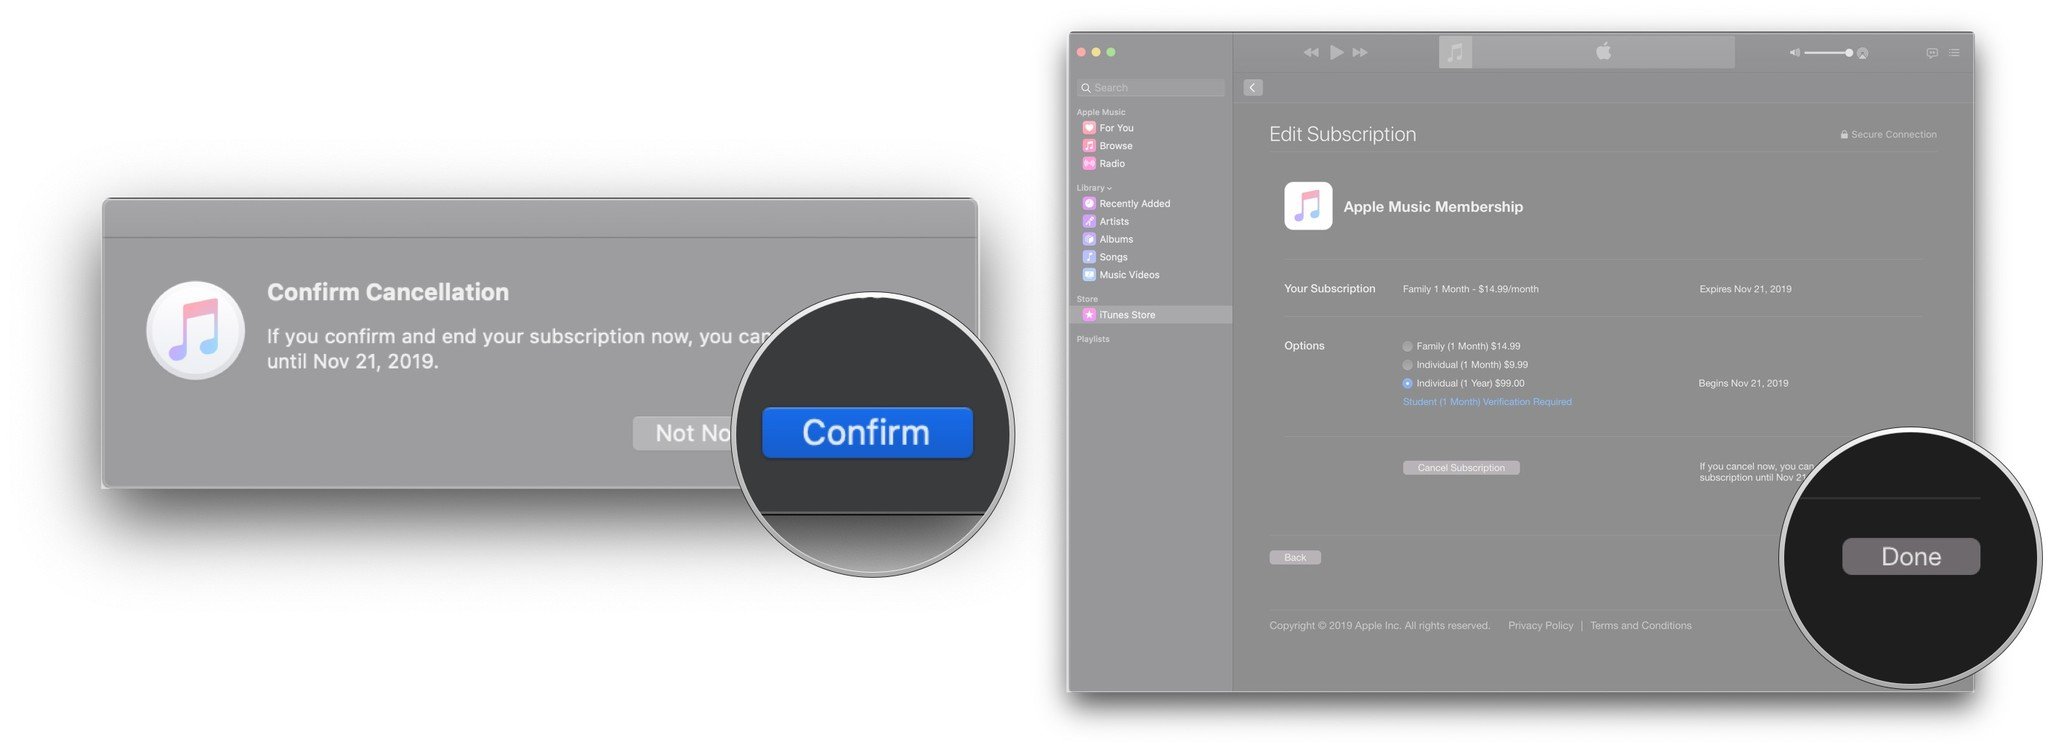
 - Click Confirm.
-
Click Done.
 Source: iMore
Easy does it
As you can see, Cupertino has made it pretty easy to manage your Apple Music subscription across different devices, including iPhone, iPad, and Mac. Make your changes today in the app whenever you need to.
Updated June 2022: Steps reflected are up-to-date for the latest versions of iOS, iPadOS, and macOS.
We may earn a commission for purchases using our links. Learn more.
[ad_2]
Source link
www.imore.com
Christine Chan